Are you experiencing White noise, background hiss, low-volume, subdued bass, and missing trebles leave room for improvement — especially when using the Raspberry Pi with audio-enjoyment software, such as RetroPie and Kodi?
Is there a way to upgrade the Pi’s audio quality?
Yes! Using a small USB audio device that plugs into any of the Pi’s USB ports, audio can be rerouted to the USB audio device for improved audio quality.
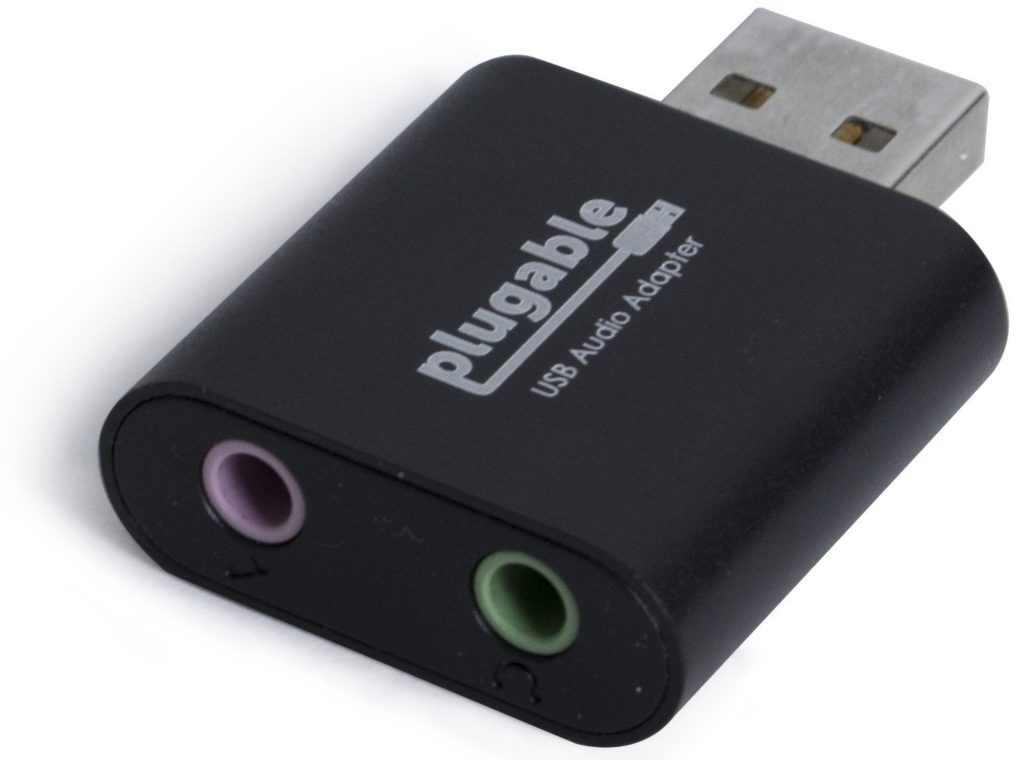
This tutorial shows how to use the Plugable USB Audio Adapter with a Raspberry Pi 2 Model B, Raspberry Pi 3 running RetroPie to produce a boost in sound quality.
- Louder sound output. No need to turn the volume up as much.
- Stronger, deeper bass. Bass is almost missing with the Pi’s built-in audio.
- High frequencies sound more distinct. Cymbals, glass, and trebles sound better.
- More clarity.
- Almost no noise. The Pi had a constant background noise (white noise) when playing sound. During moments of silence during the sound playback, the noise was distractingly audible. This adapter greatly reduces the noise. It does not eliminate it completely because faint noise can be heard if the volume on an amplifier is turned up to uncomfortable levels. However, the noise is practically in audible a normal listening levels.
Take note that sound quality also depends upon your speaker system and sound gear. While this adapter does improve the sound quality, if you are using cheap, tinny earphones, then you will probably not hear much of a difference. If you are using higher-quality headphones or speakers, then the sound difference will become noticeable.
Setting Up The Plugable USB Audio Adapter
Merely plugging in the USB audio device and turning on the Raspberry Pi will not produce audio through the USB audio. The Pi will still use its built-in audio. RetroPie must be configured to use USB audio instead.
Is the USB Audio Detected?
RetroPie will automatically register the USB device during boot. To test if RetroPie sees the device, go to the RetroPie terminal (either CTRL+ALT+F1 or ssh into RetroPie) and enter lsusb.

This shows a list of all connected USB devices. What we are interested in is the C-Media Electronics, Inc. line. If visible, then that means the USB audio is connected, detected, and ready for use.
aplay
Next, enter aplay -l to see more detail about all detected audio devices.
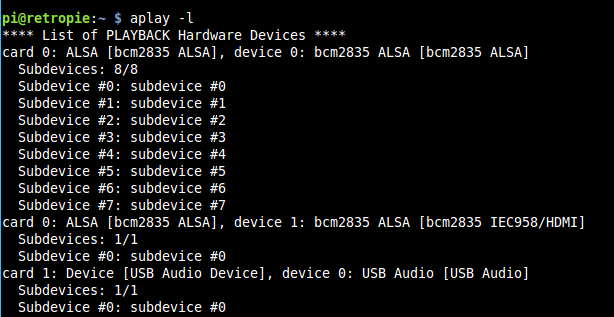
This shows two “sound cards” connected to the operating system. Card 0 should always be the built-in Pi sound hardware (bcm2835), and Card 1 is the USB audio.
We can see that the Plugable USB audio device is identified as Card 1: [USB Audio Device]. So far, so good. Now, we need to edit a configuration file that tells the Pi to use this instead of the built-in audio.
- Card 0 – bcm2835 (Built-in Pi Audio)
- Card 1 – Plugable USB Audio Device
Edit /etc/asound.conf
For RetroPie 3.4 (Raspian Jessie), we must edit the /etc/asound.conf file. Previous versions of RetroPie required a different method involving /etc/modprobe.d/alsa-base.conf, but that does not work with RetroPie 3.4.
In the RetroPie terminal, open the config file:
The file might be empty, and that is okay. Add these lines:
Simply put, this tells ALSA (Advanced Linux Sound Architecture) to use the USB audio instead of the built-in audio. Save and exit.
Restart
Now, restart RetroPie. Choosing “Restart System” from the EmulationStation “Quit” menu allows for proper shutdown.
The pi should now automatically detect and use the USB audio. Pick a game from EmulationStation and play. Be sure to remember to plug your speaker system into the USB audio’s green line-out jack using a 3.5mm plug and to turn up the volume for your speakers. It’s easy to forget this obvious step.
Adjusting Volume Output
You might want to adjust the mixer settings to your liking. In EmulationStation, enter the RetroPie settings, and choose “Configure Audio.” Then, choose “Mixer.” This opens AlsaMixer.
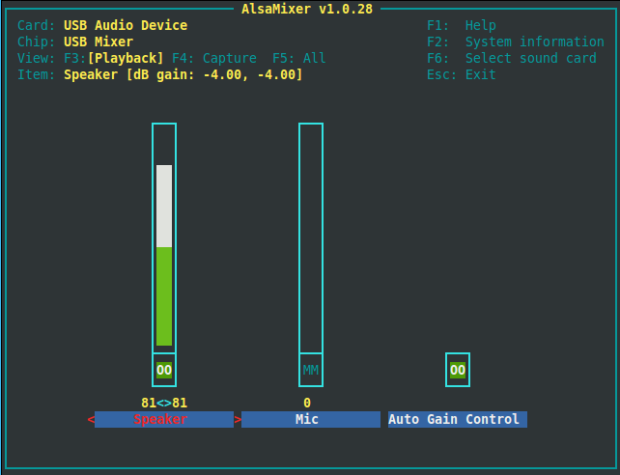
From here, you can control the volume of the USB audio. F6 lets you select which sound device to edit. In this case, I have Speaker (the green line out jack on the adapter) set to 81, which provides adequate line-level output without distortion. The Mic is set to 0 since it is not needed. Gain is set to 0 since, for my configuration, the volume is comfortable at these levels.
Once fine tuning is complete, the Pi should play audio through the USB audio adapter. For me, everything just works, and I have not experienced any issues.
Purchase: Plugable USB Audio Adapter


Works perfect as described, thx a lot
I am really pleased with this device but I do have one issue with it. I have a video splash screen that is supposed to play audio while it plays. The audio no longer plays because this device doesn’t get recognised quickly enough to play the file audio. Is there any way to fix this issue so that my splash screen audio plays while things boot. Can I delay the splash screen video a little to allow the USB audio device to be recognised?
Your code sucks, nothing you put into the “code section” works… I’m new to Linux and know just enough to fix “sudo nano /etc/asound.conf” but i have no clue how to fix the other garbage you want me to enter inside an empty file. Fix it!!!!