So I have been using Tasker a lot however I’m on the T-Mobile jump program and I switch from phone to phone quite a bit. I was going to reinsert all of my Tasker profiles however I decided to see if SmartThings had a better method yet of presence sensing. So I decided to relink my Android device as my presence sensor. I’ve been testing this for about a week now and it seems to be more accurate then all of my Tasker/AutoLocation profiles.
How I have my house configured as my car approaches the house I want my Yale Smart Deadbolts to unlock, and turn on my Front porch and side porch lights; they are wired to (Lutron Caseta Switches).
Everything worked great however I had a Tasker profile that would wait 10 minutes and turn off the porch lights. At first I tried creating a rule in SmartThings but it would turn the lights off constantly after 10 minutes even if I manual turned them on. I figured out what I need to create is a SmartThings Virtual Switch.
Below is my configuration.
Step 1. Create a virtual switch to be the timer.
To create a Virtual Switch
- Login to the IDE @ https://graph.api.smartthings.com/
- Click “My Devices“
- Click the “New Device” Button
- Enter a “Name” for the device, this can be whatever you want.
- Enter a “Label” for the device, this is optional and can be whatever you want.
-Enter a “Device Network Id” This can be anything you want. I recommend short and sweet but it cannot duplicate other device ID’s. Lets say it was a virtual switch for your living room lights, maybe call it DNID01
- “Zigbee” Id should be left blank
- Select a “Type” from the dropdown, this should be Simulated Switch (or just Switch).
- “Version” should be published
- “Location” should be your hub location, probably “Home“
- “Hub” should be your hub name.
- “Group” you won’t be able to select when creating, but these are Groups you’ve created in the Things page in the SmartThings app.
- Click Create
Now you have a Virtual On/Off Switch in Things on your SmartThings App. You can use this Virtual Device just like any physical device.
Step 2. Once you have created the virtual switch, it will show up in any list of your switches, including in Smart Lighting. (If you have not already installed Smart Lighting, do so now).
To install Smart Lights:
- Tap Marketplace

- Tap SmartApps
- Tap SmartThings Recommends
- Tap Smart Lights by SmartThings
To access Smart Lighting after installation:
- Tap Automations

- Tap SmartApps
- Tap Smart Lights
Step 3. Create the first smart lighting automation to set the timer.
Use the “power allowance” feature in smart lighting to set the virtual timer switch to always turn off after X minutes.
You do this by selecting the virtual switch as the one you want to “control” and then saying that you want to turn it “off” (not on) and then when asked how you want to “trigger” it, scroll all the way to the bottom of the page and there will be an option for “power allowance exceeded.” After you select that, you will be given a new page where you can fill in the number of minutes.
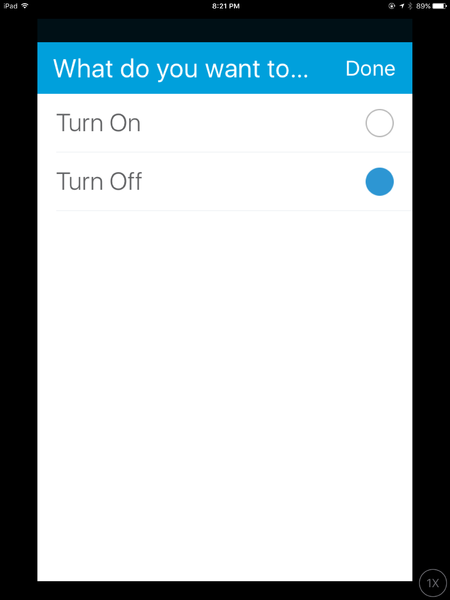
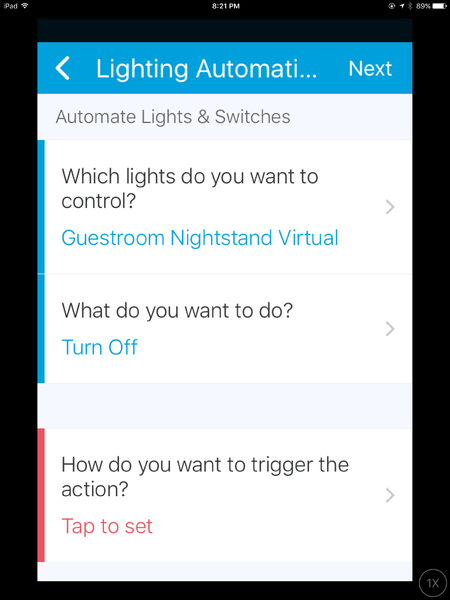
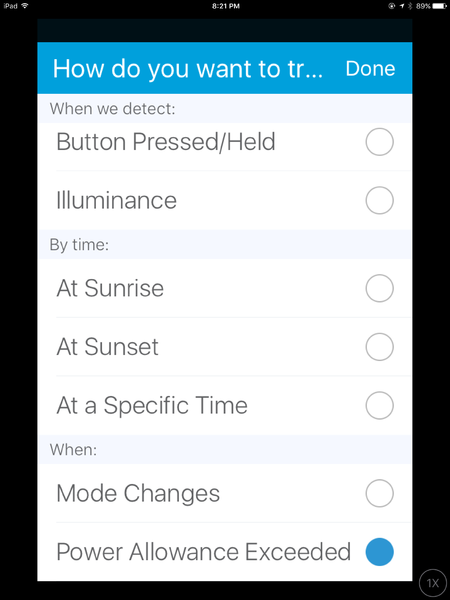
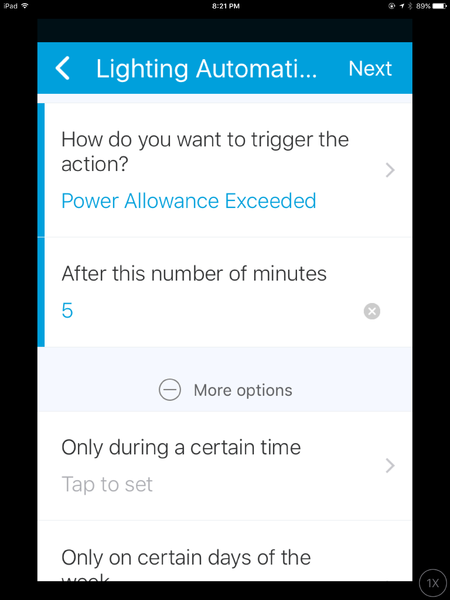
Step 4. Create the second smart lighting automation to have the real device “follow”‘ the virtual switch. That way the real device will turn on whenever the virtual switch turns on, and turn off again whenever the virtual switch turns off.
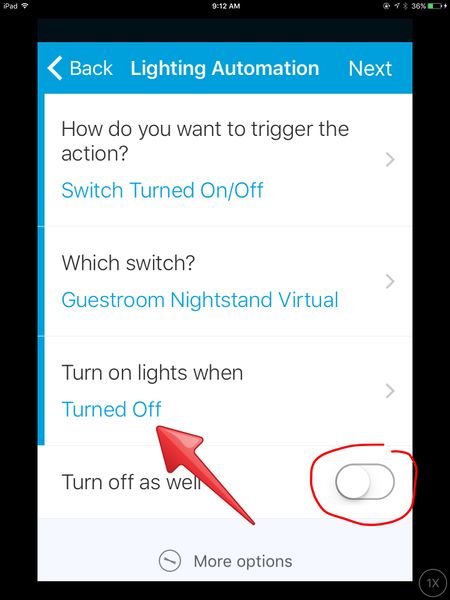
You do this by selecting the real switch as the switch that you want to “control,” choose “turn on” and then when asked how you want to “trigger” it say by switch and then choose the virtual switch from that second list. You will also be given the option to “turn off as well” – – choose that so that the real switch will also turn off when the virtual switch turns off.
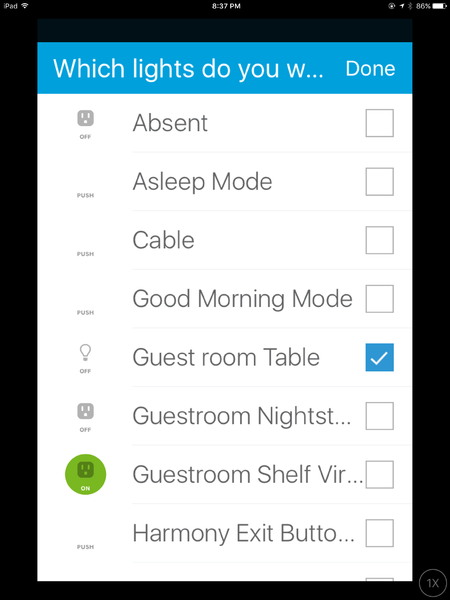
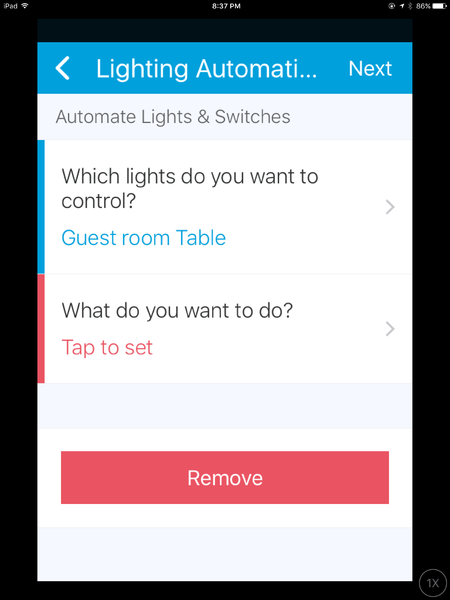
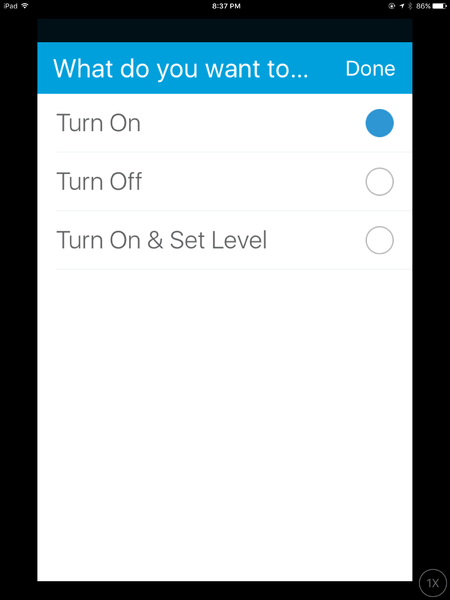
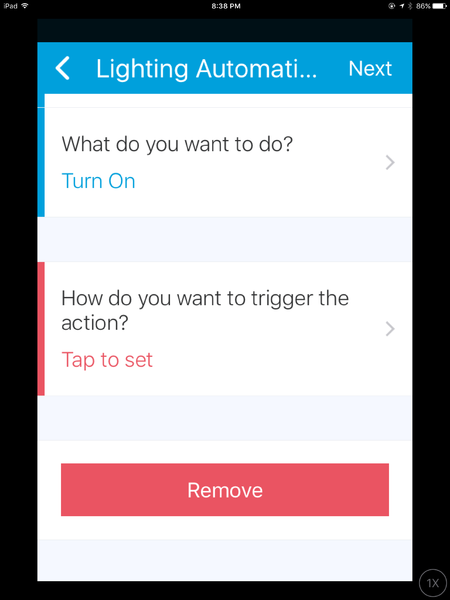
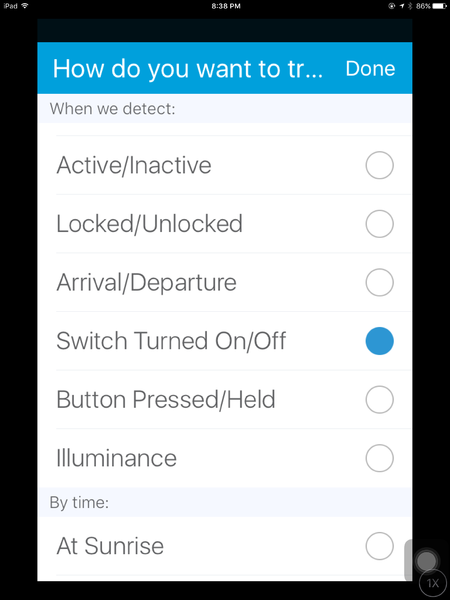
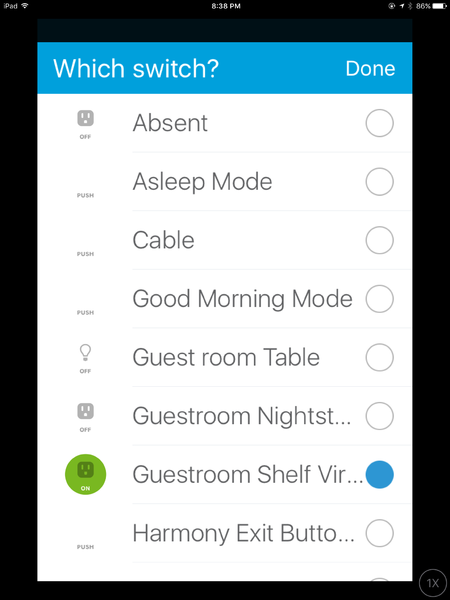
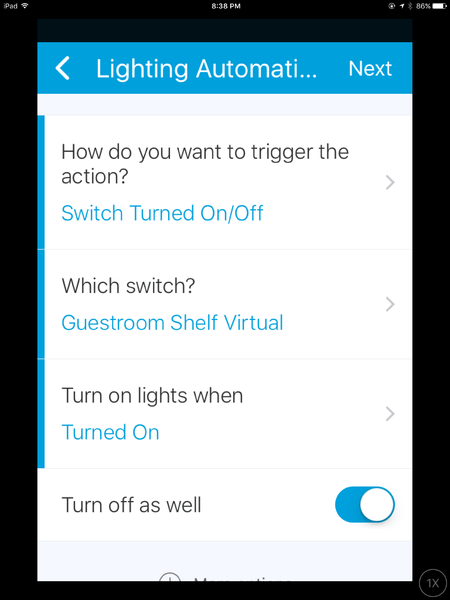
Step 5. Create the third smart lighting automation to trigger the virtual switch. Now you just need to set up something to turn the virtual switch on based on the trigger conditions you want, like time of day or someone arriving home or a particular mode. Usually this would be a smart lighting automation, but it could also be a routine or another smart app. Or you can just turn the virtual switch on by voice with Echo or Google home.
There you have it. The trigger condition occurs, the virtual switch turns on, the real device turns on because it is following the virtual switch, the virtual switch turns itself off because of the power allowance, and the real device turns itself off because it is following the virtual device. A virtual timer.
To change the length of time, open the smart lighting automation from step two (The one that uses the power allowance feature) and change the amount of time there.
You can set up different virtual timers for different trigger conditions or different lengths of time. Just remember that once you set a power allowance, that will always apply to that particular device for the conditions specified in that smart lighting automation.
You can also use the same method to set up a countdown timer which delays a switch turning on for X minutes. The only difference is that in step 3 instead of having the physical device come on when the virtual timer comes on, you will have the physical device come on when the virtual timer goes off. You also need to change the default “turn off as well” so that it will not apply.
