Since I jump from different projects every single day I decided to purchase a RaspberryPi and try out the RetroPie emulation software. The software allows for playing classic video game consoles such as Nintendo, Super Nintendo, Atari 2600, Atari Lynx, MAME Arcade games, Nintendo 64, Sega MegaDrive, Sega Genesis, Nintendo 64 and PlayStation 1 and many more.
I loved the whole idea that it would showcase the different games cover art. However when you have over 3000+ games installed I couldn’t sit there for days and continue to hit the “A” button to download the correct metadata. Since Google is amazing, I decided to browse for an easier method of grabbing all of the metadata. I came across this blog by Stephen Selph
This is an auto-scraper that runs from a command line that supports:
NES, SNES, N64, GB, GBC, GBA, MD, SMS, 32X, GG, PCE, A2600, LNX, MAME(see below) ROMs
I decided to write my own tutorial on how to achieve this using his software.
Step 1. The first step you need to do is make sure your RaspberryPi is connected to the internet either via Ethernet or Wireless (ethernet) preferred.
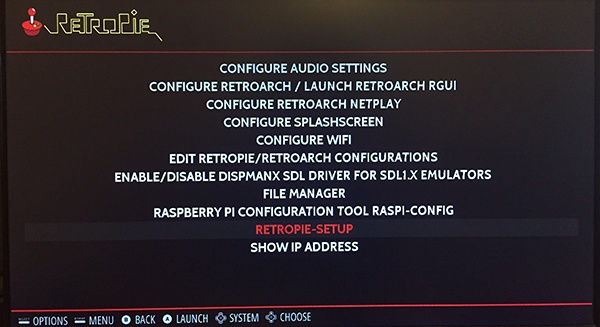
Step 2. We now need to find out our RaspberryPi or RetroPie’s current IP address. You can find this out by going to the main menu of the RetroPie interface and choosing “Show IP Information”. If you can’t find this screen you need to go to your system console list and choose “RetroPie” this is how you access the RetroPie interface menu. Choose “Show IP Address”. You should now have your IP i.e (192.168.1.2)
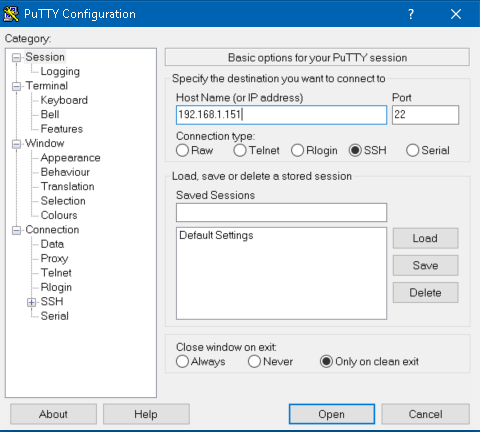
Step 3. Now you need to download Putty so you can SSH into your RaspberryPi / RetroPie. Once you have downloaded and installed Putty, launch the Putty application and enter your RetroPi’s IP Address information. Then Press “Open“.
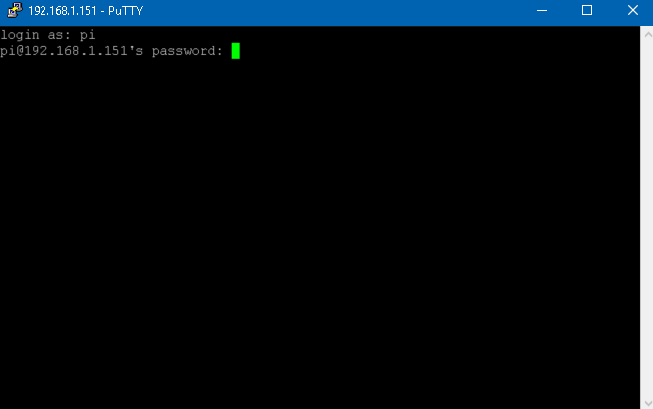
Login as username “pi” and password “raspberry“.
You are now successfully logged in to your RetroPie
Step 4. Next you want to make sure no instances of EmulationStation are running. Type the following command and press “Enter“.
If your screen looks similar to the above and you do not see “EmulationStation” your good. If EmulationStation is still running you need to use the following command to End it.
Step 5. Next we need to install the proper scraper script. Navigate to https://github.com/sselph/scraper/releases Since i’m using a RaspberryPi 3 I’m going to install: https://github.com/sselph/scraper/releases/download/v1.2.1/scraper_rpi2.zip. Now we are going to use the following command to install the script to RetroPie.
Type in the code above and press Enter, you should see something similar to the screenshot below.
Step 6. We now need to unzip the script that we just transferred to the RetroPi. Do that by type in the following command and pressing Enter.
You should have something similar to the screenshot posted below:
Step 7. Alright now that the script is installed and unzipped on your RetroPie, it’s time to put it to use. You have 2 options you can scrape all the consoles or you can navigate to the specific console you want to scrape. So in this tutorial I started with SNES (Super Nintendo). Follow the following commands to get you there:
Running the last command once you are in the SNES directory will display all of the ROMs you have installed on your RetroPie. Like shown below:
Step 8. Now we are going to run the following Scraper command to scrape all the metadata for the SNES directory.
You should now see something similar to the screenshot above.
Step 9 (Optional). If you want to scrape all of your consoles run the following command.
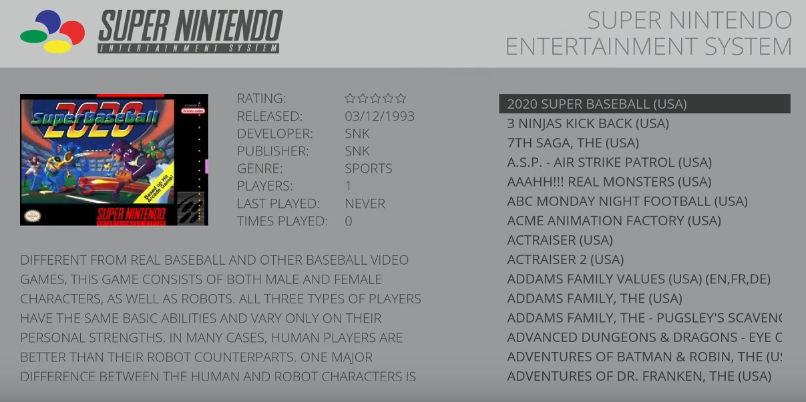
Once you reboot your RaspberryPi or RetroPie, you should notice all of your cover art successfully downloaded.
Additional Info
You can find the scraper here:
https://github.com/sselph/scraper
You can scrape all systems with this command:
https://github.com/sselph/scraper#all-systems
YouTube Video that Helped a lot:




![[Review] Samsung SmartThings Arrival Sensor v2](https://l5j.net/wp-content/uploads/2017/01/41iDZRuLxGL._SL1023_-150x150.jpg)
![[Review] Nintendo Wii U Pro Controller with RetroPie](https://l5j.net/wp-content/uploads/2017/01/7115A2m702L._SL1500_-150x150.jpg)